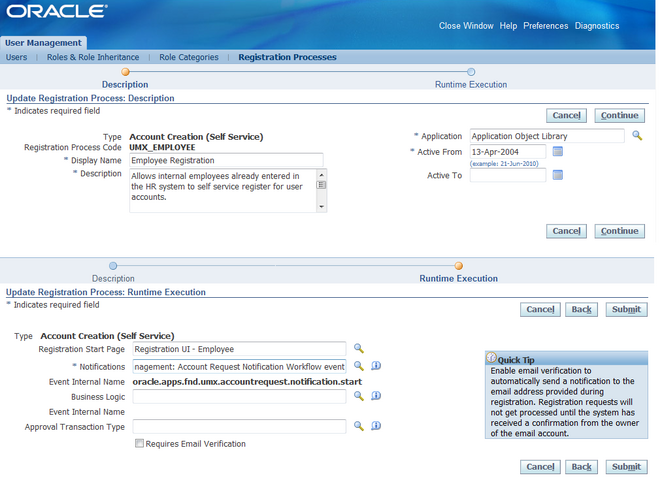
The implementor or system administrator sets up access control and security policies in Oracle Applications by defining roles, role inheritance hierarchies, role categories, and registration processes. These components specify the different levels of access to various application menus and data that are available to administrators.
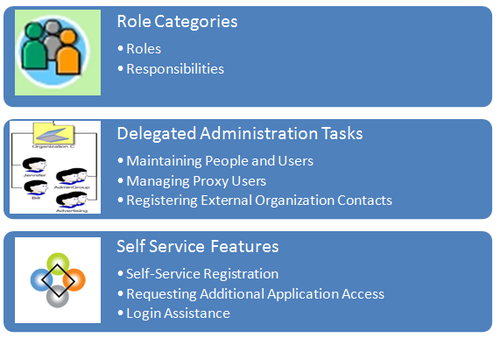
Defining Role Categories
As part of the Oracle Applications RBAC model, Oracle User Management introduces Role Categories. Administrators can create role categories to bundle roles and responsibilities to make the process of searching for roles and responsibilities easier.
Steps
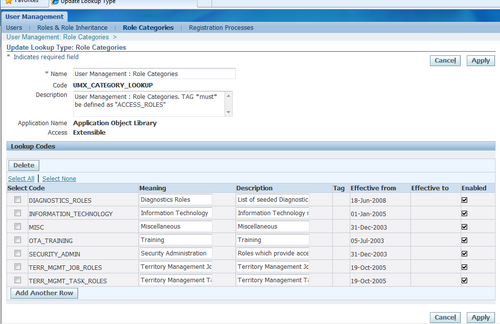
1. Log on as a user that is assigned the Security Administrator role (typically as sysadmin), select the User Management responsibility in the navigator and then click the Role Categories subtab.
2. Go to the editable table, click the Update button and then click the Create Lookup Code button.
3. Enter the required information in the Create Lookup Code fields and click the Apply button.
The newly created Role Category can be verified in Roles & Responsibilities of Roles & Role Heritance Tab.
Creating and Updating Roles
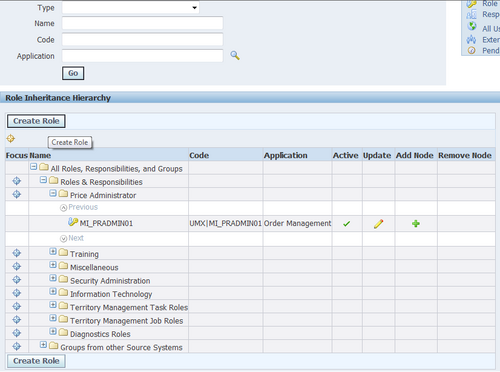
In Oracle Applications, a role represents a job function that confers the privileges required to perform that job. Roles can be defined to determine what applications (responsibilities) as well as what data and functions within those applications users can access.
1. Log on as a user that is assigned the Security Administrator role (typically as sysadmin), select the User Management responsibility in the navigator and then click the Roles & Role Inheritance subtab.
2. Click the Create Role button.
3. Enter the required information to configure your role and optionally continue to configure it by accessing the following:
- Permissions. Use this tab to assign permissions to your role.Delegated Administration Setup Using the Security Wizard Information in this section only applies to delegated administration roles in the context of the Oracle User Management application.
- User Administration. Enables you to determine the set of users that can be managed by administrators to whom your role is assigned. The administrator can assign or revoke user accounts and roles for the users you specify here.
- Organization Administration. Enables you to determine the external organizations that can be viewed in Oracle User Management by administrators to whom your role is assigned.
- Role Administration. Enables you to determine which roles the administrator can assign to or revoke from the set of users specified in the User Administration section.
4. Click Save or Apply to save your changes.
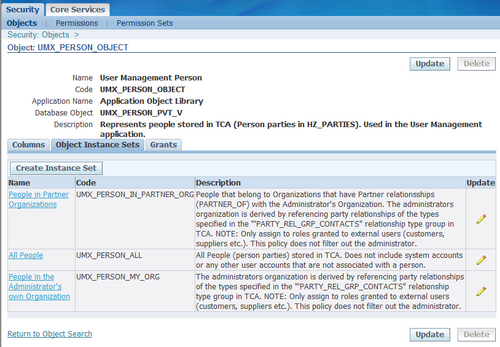
Assigning Permissions to Roles
You can assign permissions to a role by creating a grant that specifies the navigation menu, permission sets, and/or the data security policies that are available at runtime to the role’s assignees. Menus and permission sets in turn include individual functions and permissions.
1. Log on as a user that is assigned the Security Administrator role (typically as sysadmin), select the User Management responsibility in the navigator and then click the Roles & Role Inheritance subtab.
2. In the Role Inheritance Hierarchy, access the role to which you want to assign a permission and click the Update icon.
3. Click the Permissions subtab and the click Create Grant button.
4. Define the grant by entering the required information and clicking Next:
4.1. Enter the required information to identify the grant, such as Name and Effective From date.
4.2. Security Context. These optional parameters restrict the availability of the permissions being assigned. If you do not define the security context, then permissions are available to users in all contexts. Security contexts are also referred to as Activation Contexts.
4.2.1. Operating Unit. In many cases, an organization consists of several different operating units. You can limit your grant to only be active in the context of an individual operating unit.
4.2.2. Responsibility. Responsibilities determine the applications that can be accessed by users. You can optionally limit your grant to be available only in the context of an individual responsibility, or with all responsibilities.
4.2.3. Data Security. You must select a business object when you create Data Security policies. For more information, see the Oracle Application Object Library Security chapter.
5. If you have defined a specific object in the preceding step, then choose the object data context for the object, also referred to as the data scope. Specifying the object data context provides an additional level of access granularity for the object. Choose one of the following from the Data Context menu:
- All Rows. This option provides access to all rows for the database object. For example, if the database object is a book, creating a data security policy for all rows of the object will provide access to all books catalogued in the database.
- Instance. This option provides access to an instance of the object. A specific instance generally corresponds to a single row in the database, and is typically identified by the primary key value for the object. For example, a data security policy for the book object could contain a unique ISBN number, to return only one book from the database.
- Instance Set. This option provides access to a related set of instances of the object.This set is specified as a predicate on the attributes of the object. The predicate is expressed as a SQL WHERE clause, and can optionally be implemented as a VPD policy. For example, a data security policy could include an instance set for all books published in the year 2005.


Recent Comments