You can perform the general ledger transfer at any time during an open period—not just at period close. Interim transfers allow you to reconcile and transfer information weekly, making the month–end period close process much simpler and
faster.
The general ledger transfer loads summary or detail accounting activity for any open period into the general ledger interface, including both inventory and work in process entries. When more than one period is open, the transfer selects transactions from the first open period, up to the entered transfer date, and passes the correct accounting date and financial information into the general ledger interface.
For example, when you transfer detail entries, the transaction date is the accounting date with a line for line transfer. When you transfer summary entries with two periods open and enter a transfer date in the second period, the transfer process assigns the period one end date for all the summarized transactions in period one and assigns the entered transfer date for the summarized transactions in period two.
For each inventory organization, Cost Management transfers transactions to the general ledger interface table, line for line. If you transfer summary information, Cost Management groups transactions by GL batch, by journal category, by currency code, and by account.
Attention: Transfer in detail only if you have low transaction volumes. Transferring large amounts of detail transactions can
adversely affect General Ledger performance.
For both detail and summary transfers, Cost Management passes the organization code, GL batch number, batch description, and batch date. When you transfer in detail, you also pass the material or work in process transaction number. In General Ledger, you can see the transferred information, as follows:
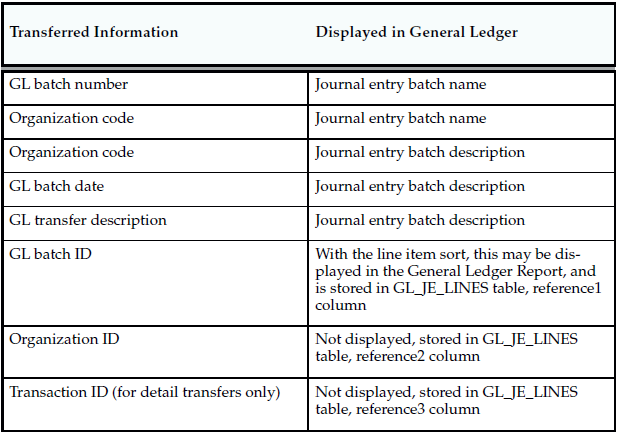
Cost Management uses the journal source Inventory for both inventory and work in process transactions.
The journal categories Inventory and Work in Process distinguish between inventory and work in process transactions.
Using Journal Import and Post Journals processes in General Ledger, you can then post this information to the general ledger.
Period Summarization Process
Summarization of transaction records for the open period is the last step in period close. You have the option to perform this process automatically or manually using the profile option, CST:Period Summary. If the profile option is set to Automatic, the period is closed and summarized when you change the period status from Open to Closed.
If the profile option is set to Manual, you can delay summarization – but you must summarize these delayed periods in accounting period order. For example, if you delay summarization for a given period, the following period cannot be summarized until the previous period is summarized. In situations where summarization is delayed, the longer the delay – the larger the number of transaction records needed for reconciliation purposes. This situation can cause summarization to take
more time to complete.
If you do not choose to summarize periods, set the period status to Closed not Summarized.
The Period Close Reconciliation report is used to compare account balances with inventory value at period end. You can run the report in simulation mode by generating it for an open period. The report can be generated at any time during the period.

The period close process for perpetual costing enables you to

  1. Summarize costs related to inventory and manufacturing activities for a given accounting period.
  2. Distribute those costs to the general ledger.
  3. Calculates ending period subinventory values.
  4. Closes the open period for Inventory and Work in Process.
  • Generally, you should open and close periods for each separate inventory organization independently. By keeping only one period open, you can ensure that your transactions are dated correctly and posted to the correct accounting period. (For month–end adjustment purposes, you can temporarily hold multiple open periods.)
  • The accounting periods and the period close process in Cost Management use the same periods, fiscal calendar, and other financial information found in General Ledger.
  • Inventory and work in process transactions automatically create accounting entries. All accounting entries have transaction dates that belong in one accounting period. You can report and reconcile your transaction activity to an accounting period and General Ledger. You can transfer summary or detail transactions to General Ledger. You can transfer these entries to General Ledger when you close the period or perform interim transfers.
  • When you transfer to General Ledger, a general ledger (GL) batch ID and organization code are sent with the transferred entries. You can review and report the GL batch number in General Ledger and request Inventory and Work in Process reports by the same batch number. You can also view general ledger transfers in Inventory and drill down by GL batch ID into the inventory and WIP accounting distributions.

Note: Purchasing holds the accounting entries for receipts into receiving inspection and for deliveries into expense
destinations. This includes any perpetual receipt accruals.Purchasing also has a separate period open and close, and uses
separate processes to load the general ledger interface.
Closes Open Period
The period close process permanently closes an open period. You can no longer charge transactions to a closed period. Once you close a period, it cannot be reopened. As a precaution, you can do a GL transfer without closing the period.
Transfers Accounting Entries to the General Ledger
If your inventory organization’s parameter for Transfer to GL is None, perpetual accounting entries are not transferred to the General Ledger. The other choices for the Transfer to GL parameter are Summary and Detail, indicating whether the period close process creates summary or detail transactions for posting to the general ledger. The period close
process transfers the following information:
• work in process transactions
• job costs and variances
• period costs for expense non–standard jobs
• depending on the selected options, the remaining balances for
repetitive schedules
Note: If you have chosen the new Periodic Costing feature, Cost Management warns you of the possibility of inadvertently
posting both Periodic and perpetual costed transactions to the General Ledger. The warning displays if there is at least one
legal entity–cost type combination that has the Periodic Cost Post Entries to GL option checked, where the organization
under that legal entity also has the perpetual cost GL transfer enabled.
Calculates Ending Period Subinventory Values
For each subinventory, the period close adds the net transaction value for the current period to the prior period’s ending value. This, along with values intransit, creates the ending value for the current period.

An account alias is an easily recognized name or label representing a general ledger account number. You can view, report, and reserve against an account alias. During a transaction, you can use the account alias instead of an account number to refer to the account.

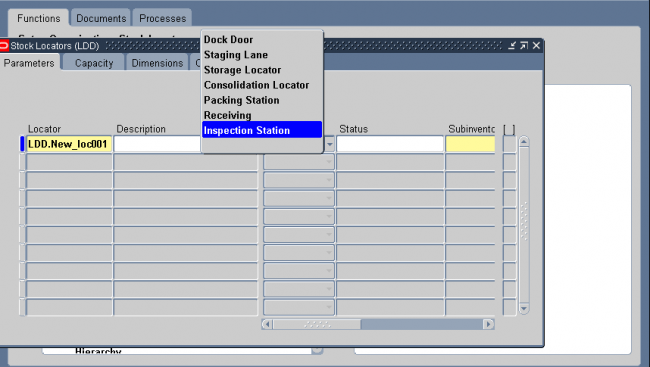
You use locators to identify physical areas where you store inventory items. Item quantities can be tracked by locator. Items can also be restricted to specific locators.

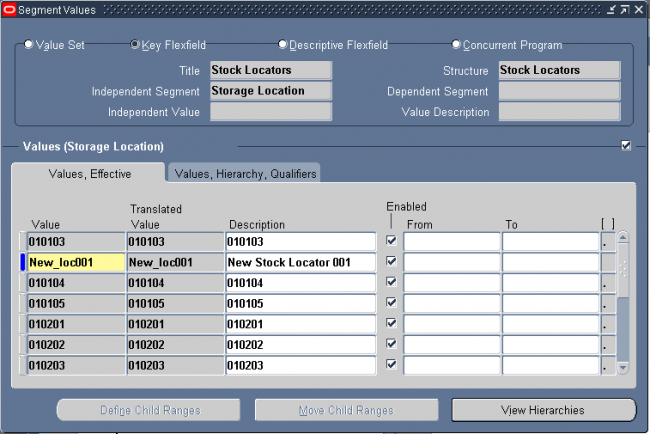
1. Add the segment values of the KFF stock locator.
Navigation : GL -> Financials -> Flexfields -> Key -> Values

2. Enter the new locator in locator form which can be accessed from below navigation or on subinventory form.

Navigation : Inventory -> Set up -> Stock Locator

 
1. Locator Type: Indicate the locator type available choices are as follows: Dock Door, Receiving, Inspection Station Storage Locator, Consolidation Locator, Staging Lane, Packing Station.  Dock doors are used in Oracle Warehouse Management environments only.
 

2. Indicate the material status of this locator, which controls the enabled transactions for all material in this locator. The status is not overridden by the status of any ubinventory, lot or serial, within this locator. The statuses of those objects will be considered when
determining transactions that are not enabled. This field is used if you have Oracle Warehouse Management installed.
3. Enter the subinventory where the locator resides.
4. Enter a picking order value indicating the priority for picking items from this locator relative to another locator. This value is used by Oracle Warehouse Managment to sequence picking tasks. A picking order of 1 means that order management functions pick items from this locator before other locators with a higher number (2, 3, and so on). If you have Oracle Warehouse Management installed, this field determines the picking path through the warehouse and not the order in which material is allocated for a sales order.
5. Enter a dropping order to indicate the priority for dropping items in this locator relative to another locator. Oracle warehouse management uses this value to sequence tasks.
6. Enter the inactive date for the locator. This is the date the locator becomes inactive.


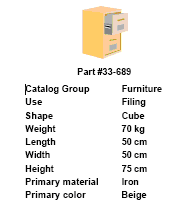
An item catalog group is a standard set of descriptive elements to which you assign items. Examples of catalog descriptive elements are color, shape, length, and so on.  For example, a textile manufacturer might define pattern attributes such as color, size, texture, and style.

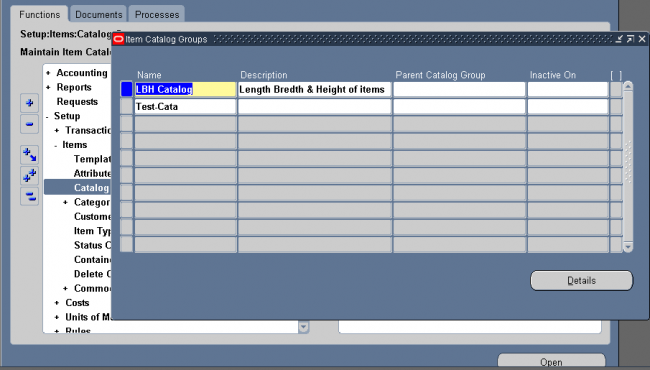
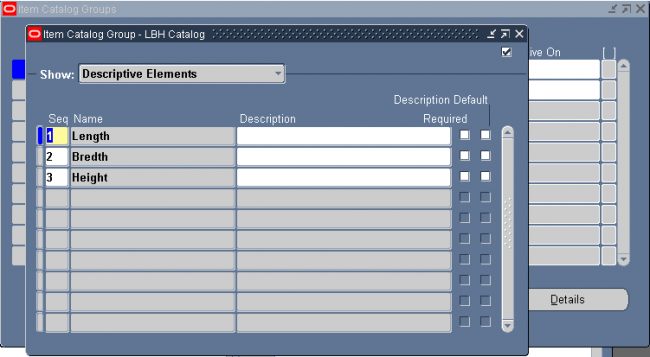
Usage: An electronics company (say Samsung) can use the catalog to incorporate length, breadth and height of each mobile it produces. As the company Samsung also produces other electronics products such as TV, Refrigerator and etc. We should first create an item category as mobile and then create a catalog group as mobile-catalog with three catalogs length-breadth and height.

Defining and Using Item Catalogs
Follow these steps to define and use item catalogs:
1 Define the item catalog group.

2 Define descriptive elements within each catalog group.

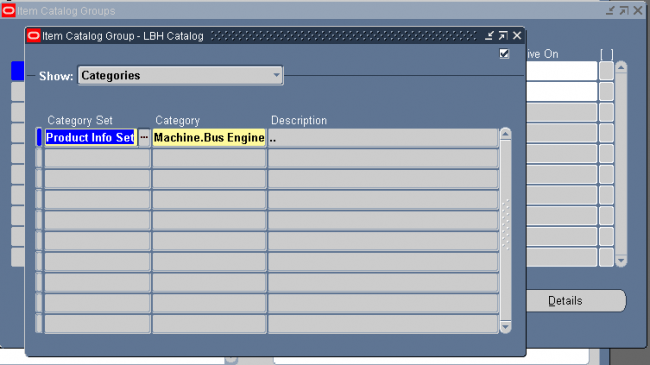
3 Enter categories for the catalog groups.

Items belonging to the above category are attached with the descriptive element of the catalog.
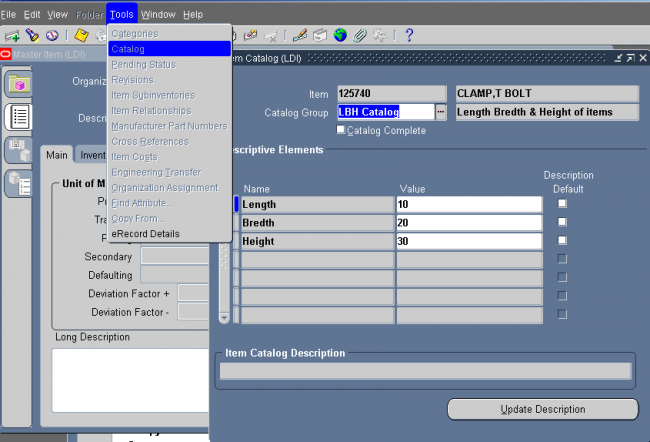
4 Enter descriptive element values for each item.

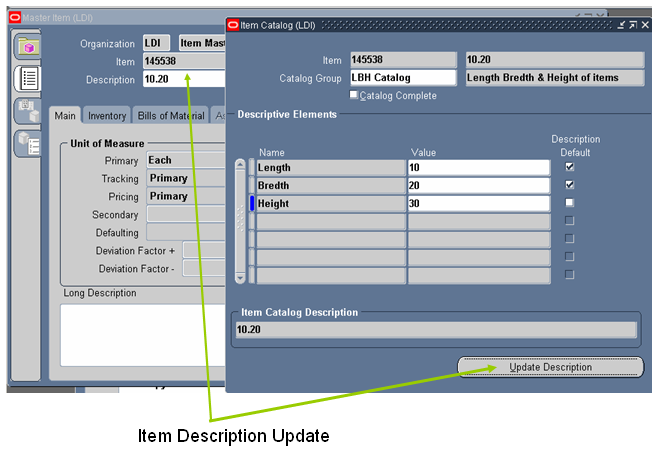
5 Update item descriptions with catalog group and descriptive element values.

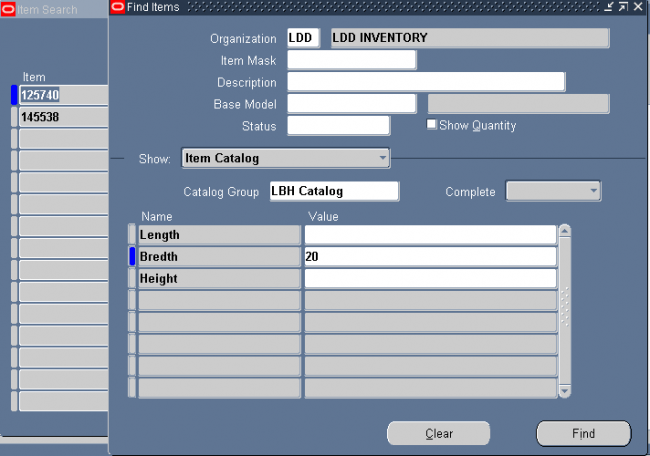
6 Search for items using descriptive elements as the search criteria.
 

Seraching all the items with bredth 20.