Define the following organizaions as per the requirement of business
i. Business group
ii. Legal Entity
iii. Operating Units
iv. Organization
External organizations (for example, tax offices, insurance carriers, disability organizations, benefit carriers, or recruitment agencies)
Internal organizations (for example, departments, sections or cost centers)
Creating an Organization
1. Enter a name for your organization in the Name field. A check is performed to see if organizations with the same name already exist.
All Oracle applications you install share the information entered in the Organization window. Therefore organization names must be unique within a business group, and business group names must be unique across your applications network.
You can create two organizations with the same name in different business groups but this can cause confusion later, if the HR: Cross business group profile option is set to Yes and you decide to share certain information across all business groups. If you decide to create two organizations with the same name, be sure that this will not cause you problems in the future.
2. Optionally, select an organization type in the Type field.
Organization types do not classify your organization, you use them for reporting purposes only. The type may identify the function an organization performs, such as Administration or Service, or the level of each organization in your enterprise, such as Division, Department or Cost Center.
3. Enter a start date in the From field. This should be early enough to include any historical information you need to enter.
Note: You cannot assign an employee to an organization before the start date of the organization.
4. Enter a location, if one exists. You can also enter an internal address to add more details such as floor or office number.
If you are using Oracle Payroll in the US, every organization to which employees can have assignments, including business groups, must have on record a location with a complete address. This is because the system uses the location of the organization of the employee’s primary assignment to determine employee work locations for tax purposes. This does not apply to GREs, because the assignment to a GRE exists in addition to the assignment to an organization.
For Dutch users only, if you are setting up external organizations for a tax office, a social insurance provider or a private health insurance provider, you must enter the postal address and contact details using the NL_POSTAL_ADDRESS Location EIT.
Note: If you are an Oracle Inventory user, then you must not assign a location to more than one organization classified as an Inventory Organization.
5. Enter internal or external in the Internal or External field. You cannot assign people to an external organization.
Examples of external organizations that may require entry are disability organizations, benefits carriers, insurance carriers, organizations that employees name as beneficiaries of certain employee benefits, and organizations that are recipients of third party payments from employees’ pay.
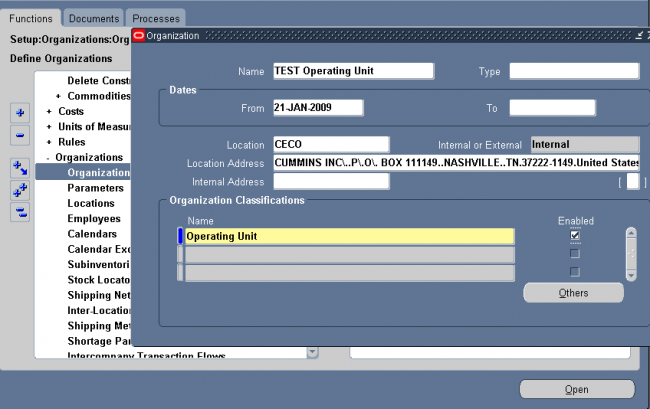
 
 
Inventory : Setup -> Organizations -> Organization
 
Enter Organization Classifications & Additional Information
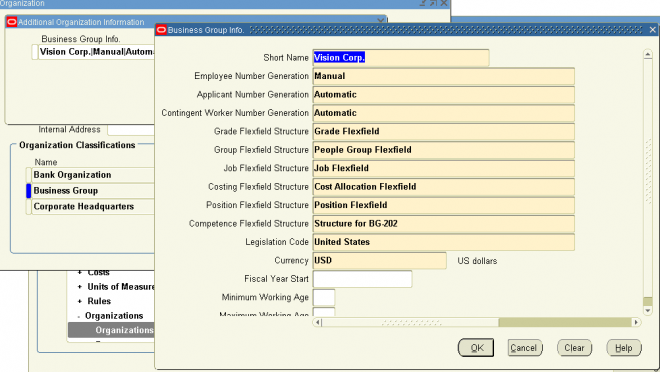
1. Business Group
Business Group Information.
Budget Value Defaults.
Work Day Information.
Benefits Defaults.
PTO Balance Type.
Recruitment Information.
Payslip Information.
Self Service Preference Information.
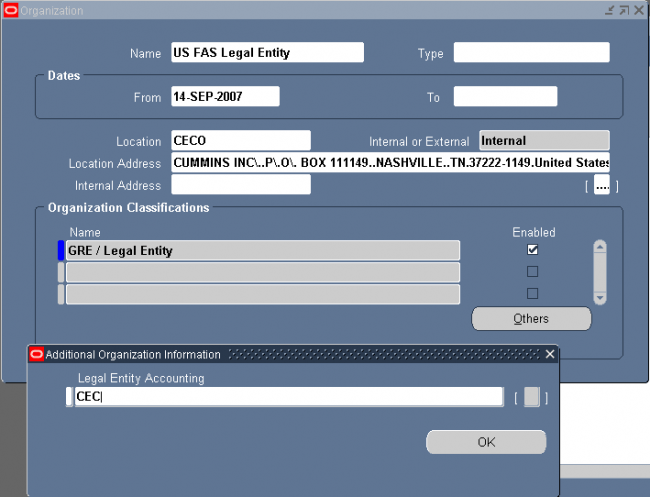
2. Attaching Set of Books to Legal Entity
 
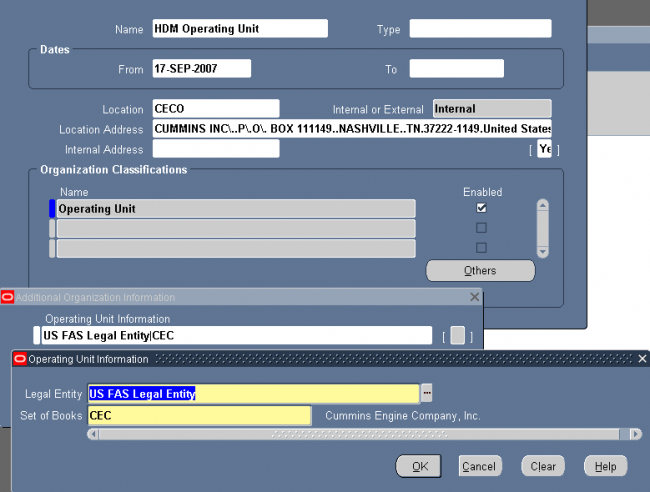
3. Attaching Set of Books & Legal Entity to Operating Unit
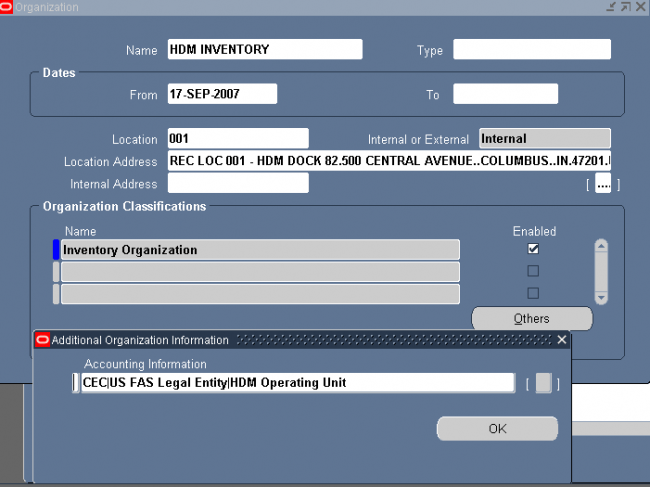
4. Attaching Operating Unit to organization
There are two types of auditing in Oracle Applications: auditing users, and auditing database row changes.
Auditing User Activity
Auditing users is supported by:
• Sign-On:Audit Level profile option setting
• Audit Reports
Based on the audit level you choose, Sign-On audit records usernames, dates, and times of users accessing the system, as well as what responsibilities, forms, and terminals users are using.
Auditing Database Row Changes
Auditing database row changes is supported by:
• From the Help menu, About This Record
• AuditTrail:Activate profile option setting
• Audit forms

Implementors and administrators can verify the successful configuration of end user functions by performing the tasks described in this section.
Self-Service Registration
Oracle User Management enables users to register for access to applications without requiring assistance from administrators. To register for application access, users must provide information in the required fields and click the Submit button.
Oracle User Management ships with the following sample self-service registration processes:

  • Employee Self-Service Registration
  • Customer Self-Service Registration (external individuals)

Organizations can use these registration processes in their existing form, or can use them as references for developing their own registration processes.
Requesting Additional Application Access
Oracle User Management enables you to request additional access to the specific applications for which you are eligible. Application access is based on roles and to access an application you must be granted the appropriate role. Perform the following to view the roles you have been assigned and to request additional ones.
Steps
1. After logging into the system, click the Preferences link in the upper right corner, and click the Access Requests link in the sidebar menu. The Access Requests page displays the roles you have been assigned. Click the Request Access button to request one or more additional roles.
2. Most roles are organized according to role categories: roles that are not categorized appear under the Miscellaneous node. Select the role category that contains the role you want to request. If you do not see the required role, then either you are not eligible for the role or it has not been set up to for additional access requests.
3. Select the role or roles you require for additional access to the system, and click on the Add to List button. You can optionally remove roles from your list by clicking on the Remove Roles button.
4. When you have selected all your required roles, click on the Next button.
5. Enter a justification for your request and click on the Next button. You can remove any pending roles or check their status in the page that appears next.
Guidelines
Some roles may require you to provide additional information. In such cases, the system will prompt you for additional information before you can complete the process for requesting a role.
If the role being assigned would cause a separation of duties violation, the operation will flag this in the workflow attributes, and any approvers for the request will see the details.
Login Assistance
It is not uncommon for system administrators to have to reset a user’s forgotten password, or even advise a user of the account’s user (login) name. This is unproductive for both the user, who cannot do any work in the meantime, and for the administrator.
In addition, a user will occasionally request the password to be reset, when it is actually the user name that has been forgotten, or vice versa. This type of occurrence leads to even more time being lost.
A new feature reduces the time spent in such administrative activities by implementing a login help mechanism that is easily accessed from the E-Business Suite Login Page. A user simply clicks on the “Login Assistance” link located below the Login and Cancel buttons.
On the screen that appears, you can either:

  • Go to the Forgot Password section, enter the correct user name and then click on the “Forgot Password” button. You will then be emailed details of how to reset your password.
  • Go to the Forgot User Name section, enter the email address associated with the account, and click on the Forgot User Name button. The user name will then be emailed to the address specified.

For security, the relevant data is stored securely in workflow tables, and the URLs employed have both an expiration time and a single-use limitation.
The identify verification process required in previous Applications releases is no longer needed. Instead, a link to a secure page is sent to the email address of the user name defined in the system. From this secure page, the user can change password immediately.

Using the following profile options you can specify limits on user sessions.
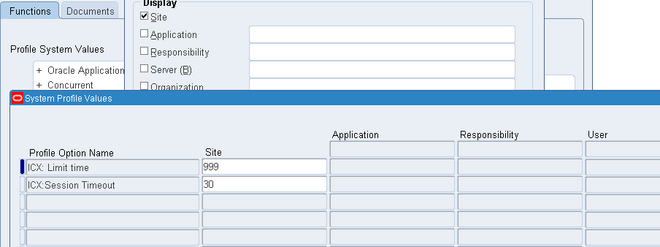
ICX:Session Timeout
Use this profile option to enforce an inactivity time-out. If a user performs no Oracle Applications operation for a time period longer than the time-out value (specified in minutes), the user’s session is disabled. The user is provided an opportunity to re-authenticate and re-enable a timed-out session. If re-authentication is successful, the session is re-enabled and no work is lost. Otherwise, Oracle Applications exits without saving pending work.
If this profile option to 0 or NULL, then user sessions will never time out due to inactivity.
ICX: Limit time
Use this profile option to specify the absolute maximum length of time (in hours) of any user session, active or inactive.


Data Security uses the concept of an Object to define the data records that are secured.
Object
Data security permissions are managed on objects. Business entities such as Projects and Users are examples of objects. Only a securable business-level concept should be registered as an object. An object definition includes the business name of the object and identifies the main table and primary key columns used to access the object.
Object Instance
An object instance is a specific example of an object, such as Project Number 123 or User JDOE. An object instance generally corresponds to a row in the database. An instance is identified by a set of one or more primary key values as defined by the object. In addition, “All Rows” for an object indicates all data rows of the object.
Users and Groups
Users and groups are Oracle Workflow roles. See the Oracle Workflow documentation for more information on roles.
Privileges given to users and groups determine their access to secured objects.
The data security system allows you to assign privileges to groups of users instead of assigning privileges to each user individually.
Users
Users are individuals who have access to software applications at a particular enterprise. A user must have a unique name and should map one-to-one with an individual human or system. “Group” accounts are not correct uses of the user entity.
Groups
Users can belong to Groups. The grouping can come from position or organization relationships modeled in applications such as Oracle Human Resources. Alternatively, ad-hoc groups can be created explicitly for security purposes. A group is sometimes referred to as a role.

Creating Objects

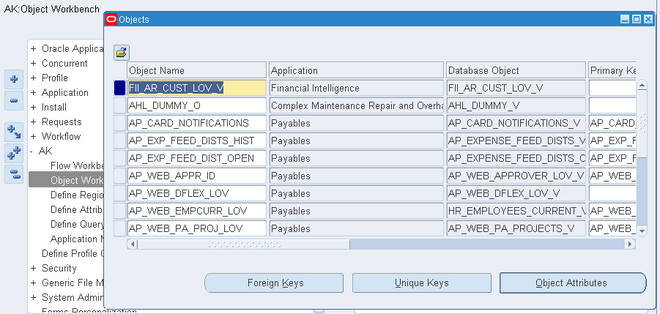
Use these pages to find, create, and edit data objects. You define objects to be secured in the Data Security system. Objects can be tables or views. An object must be queryable in SQL, and the combination of primary key columns specified must be a unique key.
In these pages, objects are described with the following

  • The Name is the name that appears in the Object Instance Set and Grants pages. This name should be user-friendly.
  • The Code is the internal name of the object.
  • The Application Name is the owning application.
  • The Database Object Name is the name of the underlying database object