Steps to Create Report in Oracle Reports Builder 10g
In Oracle Reports, you have two options for building a paper report. The first one is to use the wizards and editors in Reports Builder. The second one is to define the data model and/or layout for your paper report in XML.
Here we will discuss the steps to build a paper report using the Report Wizard.
Step 1: Invoking Reports Builder and the Report Wizard
When you invoke Reports Builder, the Welcome dialog box gives you the option of using the Wizard to build a new report. The Report Wizard provides an easy step-by-step interface to create a new report.
The Report Wizard opens with a Welcome page. To suppress this page, clear the “Display at startup” check box. You can reinstate this page in the same way as the Welcome dialog box in Reports Builder; select the Wizard tab in the Preferences dialog box and then select Report Wizard Welcome Page.
Each page of the Report Wizard asks you for information to help you create your initial report. Step through the wizard pages, selecting Next and Back, until you are satisfied with the initial information that you have entered. On the last page, select Finish.
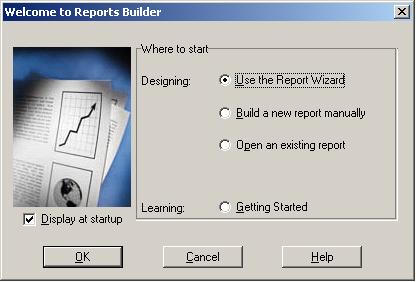
Welcome to Reports Builder
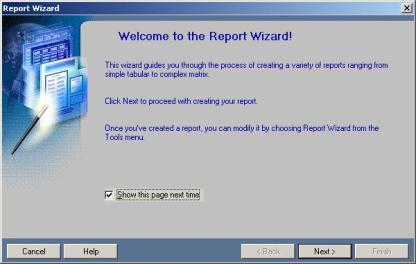
Report Wizard
Step 2: Choosing the Layout Type
Here you have to specify the type of layout you want the Wizard to generate. The available options are:
- Web and Paper Layout
- Web Layout only
- Paper Layout only
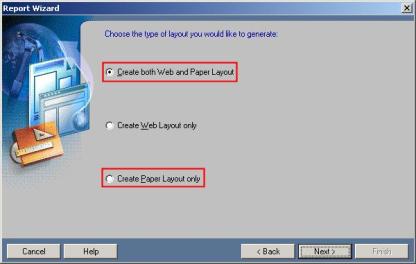
Report Layout Type
Step 3: Choosing a Report Style
This page of the Report Wizard shows the various styles of reports. Select Tabular and then click Next.

Report Style
Step 4: Selecting the Data Source Type
Next, you have to define the data source type for your report. Through the implementation of the Pluggable Data Source (PDS) feature in Oracle Reports, the data for your report can come from any source you choose. Reports Builder provides interface definitions that act as a translator between Reports Builder and a PDS by redefining Reports Builder’s requests in terms your data source uses.
Oracle Express Server, OLAP, JDBC, Text and XML pluggable data sources are shipped with Oracle Reports. You can also define your own data source.

Data Source Type
Step 5: Building a Query using Query Builder
Building your query with the Query Builder GUI saves you time and increases the ease of use for developers not familiar with building SQL statements or with the application tables.
To build a query using Query Builder:
- Select Query Builder from the Query page in the Report Wizard.
- Enter your username, password, and alias in the Connect dialog box that appears if you have not already connected to the database.
- Select the data tables to build the query.
- Click Include. The tables appear in the selection area.
- Click Close to close the Select Data Tables window.
- In each table, double-click the column names that you want in the query, or use the check boxes. To select all columns, double-click the Table title bar.
- Click OK.
Query Builder copies the query syntax into the Report Wizard. You can modify the query by reentering Query Builder or by modifying the SQL query statement text.
Note: If you prefer to write your own SQL statement, enter the syntax directly in the SQL query statement area of the Query page. Alternatively, you can import the contents of a file by clicking Import SQL Query.

Query Builder
Step 6: Selecting Displayed Fields
In the Field page, select each field from the Available Fields list and click >. The selected fields move to the Displayed Fields list. To display all fields, click >>.
You can alter the sequence of displayed fields by dragging one field above or below another in the list. The sequence of fields in this list determines how the fields appear in the report output. In a tabular report, the fields appear in sequence from left to right across the page.
Fields that remain in the Available Fields list are available for you to reference in your report definition as hidden fields or in PL/SQL trigger code.
In the report output, the user sees only those fields that you transfer to the Displayed Fields list.

Displayed Fields
Step 7: Totals and Labels
In the next two pages of the Report Wizard, you can create totals based on any of the displayed fields and modify the labels and width of the displayed fields.
Totals: Standard SQL aggregate functions are provided for creating totals in your report.
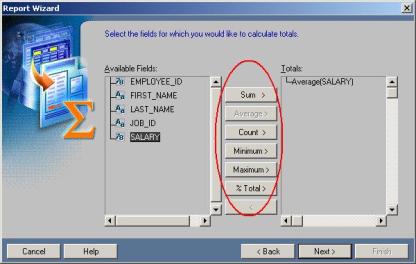
Total Fields
Labels: The field label is displayed on one or more lines in the report output. In a tabular report, the labels appear above the field values.
- If the initial label is wider than the field, Reports Builder allows enough space for the label, or displays it on multiple lines.
- If you increase the number of characters in the label text in the reentrant Wizard, the label can appear truncated in the report output.
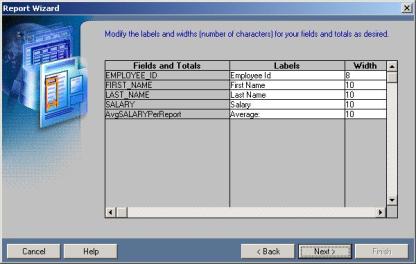
Labels
Step 8: Selecting a Report Template
Report Templates enforce corporate standards as well as create professional-looking paper reports easily.
Select a template from the list of predefined template names. In a template, the fonts, styles, and colors are already selected for designated objects. A variety of templates are available with the standard Reports installation.
To select a predefined template:
- Select the Predefined Template option button, if it is not already selected.
- Select a template from the Template list.
- Click Finish.
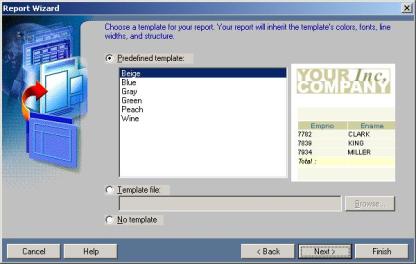
Report Template
Step 9: Viewing the Paper Report Output
When you finish creating your report in the Report Wizard, the output appears in the Paper Design view of the Report Editor.
Magnifying the Output
The Paper Design view contains a Magnify tool in the vertical toolbar. This provides a view of the area of layout you want to see. You can also use the View menu to magnify or reduce the size of the output. Select View > Zoom to see your options.
Viewing Different Pages
The Paper Design toolbar contains four buttons, and the specific page option, with which you can scroll through the pages of your report.
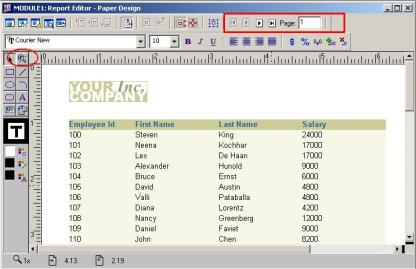
Report Output
Step 10: Saving the Report Definition
Remember to save the report frequently by selecting Save in the toolbar, or by using the File > Save menu option. The recommended format for storing paper reports is with an .rdf extension.
If you want to make a copy of the report definition in a different filename, use the menu option File > Save As. There is no toolbar button for the Save As option.
Source: Oracle


Recent Comments