You must plan how Oracle Inventory represents your company’s inventory sites and business units. This includes defining organizations, locations, subinventories, and locators depending on your company structure. You also must plan how to implement certain parameters and what level of the structure controls them.

Multi-org often refers to an Oracle Applications setup used to enable multiple business units in a single install.  With multi-org, a business enterprise may set up multiple business units with differing sets of books, operating units, and legal entities all within a single instance.  With multi-org, goods my be sold out of one operating unit or legal entity and shipped out of another, and the system will process an intercompany sale to properly account for it.
Multi-org, however, should not be mistaken for installs with multiple inventory organizations.  You do not have to use Oracle Applications multi-org to support multiple inventory organizations if all the inventory organizations share the same set of books, operating unit, and legal entity.
Location:  A location is simply a name and address, and is assigned to an organization or used to indicate delivery information on a purchase order.  You may define as many locations as you like, but only one location may be assigned to an inventory organization. 
Business group is a group of companies that does business in different markets under common administrative or financial control whose members are linked by relations of interpersonal trust on the bases of similar personal ethnic or commercial background a business group.
Set of Books (SOB): The financial entity that represents the chart of accounts, fiscal calendar, and base currency.  The SOB is set up in the General Ledger.
Legal Entity Organization: An entity used to represent a legal company.  Fiscal and tax reporting are done at the Legal Entity level.
A legal employer is a legal entity that is responsible for employing people in a particular country. Therefore, if you employ people in a country, then you must have at least one organization classified as a legal entity and a legal employer.
The Configuration Workbench classifies an organization as a GRE/Legal Entity where your enterprise operates in a country, and classifies it as an Employer if you employ people in that country also. For example, you can have a legal entity in a country where you do business, but do not employ people in that country.
Operating Unit Organization: A business unit that shares a common Purchasing, Accounts Payable, Order Entry and Accounts Receivable setup.  An operating unit may consist of multiple inventory organizations, with multiple manufacturing sites, distribution centers, and sales offices, but they share a common sales order and purchase order system.  For example, a sales order may have lines shipping from different inventory organizations or a purchase order may have lines destined for different inventory organizations.
Inventory Organization:  An entity used to represent a manufacturing or distribution site.  Inventory organizations are where a user tracks on-hand balances, manufactures goods, and transacts the daily ins and outs of material movement.  An inventory organization is the lowest level entity for costing goods, planning material requirements, and securing system access.  Only a single address may be assigned to an Inventory Organization.  An inventory organization is assigned a Set of Books which determines the chart of accounts, fiscal calendar, and base currency for all financial and value added activities that occur within the organization. 
Inventory Organizations are also assigned to a Legal Entity Organization and an Operating Unit Organization.
A variation on the inventory organization is the master item organization.  Generally, with Oracle Applications a single inventory organization is created and designated at the master organization.  Items are defined first in the master organization, then enabled in other inventory organizations as necessary.  Some of the item attributes are set as controlled at the master organization and therefore the attribute values cannot be updated within individual inventory organizations.  Category sets may also be designated as master organization level.  Cross-references are also master level only or master level optional as well.  
Subinventory: Physical or logical locations for storing inventory.  Subinventories are generally defined to represent the main stores area as well as stocking points on the production floor.  Additional subinventories may be used to specify supply closets or cabinets and the cage area for discrepant material.  Subinventories are flagged as to availability for planning (nettable), reservations, and available to promise checks, thereby determining the availability of the material stored in the subinventory.  Subinventories are assigned material asset account numbers.  As goods move in and out of a subinventory a transaction posts to the asset account.
Stock Locator:  A physical area within a stockroom.  The stock locator is a key flexfield that is often defined as a multiple segment flexfield with the segments representing the physical layout of a stockroom.  For example, a stockroom may be laid out in rows of shelves with bins on the shelves, each numbered so that a row/shelf/bin combination would direct someone to a particular material storage compartment.  Such an implementation would define a locator flexfield as a 3 segment flexfield with segments for row, shelf, and bin.
Attachment of LE/OU/INV with BG
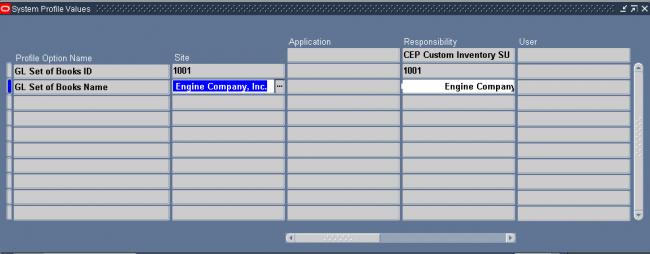
We never attach any LE/OU/INV with BG in front end…but its available in HR_ALL_ORGANIZATION_UNITS in column Business_Group_ID..so the question is from where it comes?
First we create a Business Group. When ever we create a business group the system creates an organization with type businessgroup and attach a business group ID ‘N’ which
is same as the organization ID for that Business group.
After that we attach the business group to a responsibility through the profile option HR : Business Group.
Next we create whenever we create a new LE/OU/Inv with one responsibility the system ‘ll attach the Business Group which is attached with the HR : Business group for that particular responsibility.
MTL_TRANSACTIONS_INTERFACE table is the Interface between non-Inventory applications and the Inventory  Transactions module.  In other words any other module other than Inventory that wants to update  Inventory has to come  through this table. Modules such as WIP (Work In Progress)  and OE (Order Entry) first pass their records to the  MTL_TRANSACTIONS_INTERFACE (MTI)for validation.

There is an Interface Manager called the Transactions Manager (INCTCM) which  reads records from this table, validates them and moves the successful  transactions onto MTL_MATERIAL_TRANSACTIONS_TEMP, and submits Transaction workers (sub-processes – INCTCW) which then processes these records through inventory. This process consists of data derivation, validation, and transfer of records from MTL_TRANSCTIONS_INTERFACE, MTL_TRANSACTIONS_LOTS_INTERFACE and MTL_SERIAL_NUMBERS_INTERFACE  into their respective TEMP (temporary) tables from where the transactions  processor processes them.
Both the Lots and Serial number tables above are used when items being  updated are under ‘Lot’ or ‘Serial’ number control. Example :- In the case  of an Sales Order, the item is being shipped to a client so the lot and serial  number if being used, this needs to be updated to show that it is no longer available in Inventory stock.
It is important to note that in general the processors will not move the transactions from this table if the following fields are not set as follows.
LOCK_FLAG = 2
PROCESS_FLAG = 1
transaction_mode = 3
Once the transactions have been passed to this table after initial validation by the Transactions Manager (INCTCM) from the MTL_TRANSACTIONS_INTERFACE a job id is attached and a Transactions Worker (INCTCW) is submitted by the INCTCM process in order to the get the records processed and moved to the MTL_MATERIAL_TRANSACTONS table.
This table is also used by Inventory Module and Purchasing module which writes directly onto this table for any transactions entered within itself and each transaction in turn through a process of strict validation.
Inventory Module Forms like Miscellaneous transactions writes directly into this table. The transactions which are done through these form are on-line processing. It is from here that the inventory quantities finally  get updated,serial/lot numbers get marked as being used.


Picking Rules
When you define an item you choose a picking rule to determine the order in which revisions, lots, subinventories, and locators are picked for sales order. Oracle Shipping Execution submits requests to Oracle Inventory, which uses the information you enter in the Picking Rules window to generate pick lists for sales orders.
If you choose None for any of the criteria fields, Inventory ignores that criterion. For example, if you choose None for Revision, Inventory picks units of an item without regard to revision levels.
Oracle Inventory looks at the picking criteria in the order in which they appear in the Picking Rules window. Then, Inventory looks at the options (except for None options) for each criterion in the order in which they appear beneath each criterion.
To define a picking rule

1. Navigate to the Picking Rules window.
2. Enter a unique name for the rule.
3. Select an option for revision order:
Revision: Pick most recent revision.
Effective Date: Pick earliest revision effective date.
None: Do not consider revision levels in the picking process.
4. Select an option for lot order:
Expiration Date: Pick earliest lot expiration date.
Receipt Date: Pick earliest lot receipt date, the date you received items into their current location.
Lot Number: Pick lowest lot number.
None: Do not consider lot numbers in the picking process.
5. Select an option for subinventory order:
Subinventory: Pick by order defined for each subinventory.
Receipt Date: Pick earliest subinventory receipt date.
None: Do not consider subinventories in the picking process.
6. Select an option for locator order:
Locator: Pick items according to the picking order defined for each locator.
Receipt Date: Pick items according to the earliest locator receipt date.
None: Do not consider locators in the picking process.
  
To delete a picking rule
You can delete a picking rule if there are no references to it.

Lot specific conversions enable you to perform a specific inter-class conversion for a given lot. This enables you to establish more granular control over the transactional quantities of a lot. For example, the standard inter-class conversion for a lot controlled item is one gallon equals 15 pounds; however, when you receive a particular lot of the item, 1 gallon equals 16 pounds. You can create a lot specific unit of measure for this instance.
You can create lot-specific unit of measure conversions for on-hand lots or lots with a zero balance. If you create a lot-specific conversion for a lot with on-hand quantities, you can automatically update the quantities in the system to more accurately reflect the on-hand quantity.
You can also view the history of changes made to the lot unit of measure conversion, and the corresponding quantity changes.


1. Enter the item number in the Item field.
2. Enter the lot number in the Lot Number field.
3. Select the destination base unit of measure of the class to which you are converting the unit of measure.
4. Enter the conversion factor by which the source base unit is equivalent to the destination base unit.
For example, if 16 pounds (source base unit) is equivalent to 1 Gallon (destination base unit), the conversion factor is 16.
5. Optionally, enter an inactive date for the conversion. This is the date when the unit of measure conversion for the lot reverts back to the standard inter-class conversion.
6. Optionally, enter a transaction reason for the conversion.

Unit of measure conversions are numerical factors that enable you to perform transactions in units other than the primary unit of the item being transacted. You can define:
A conversion common to any item (Standard)
A conversion for a specific item within a unit of measure class (Intra-class)
A conversion for a specific item between unit of measure classes (Inter-class)
  • Unit of measure conversions are not organization-specific.
  • You must define a conversion between a non-base unit of measure and the base unit of measure before you can assign the non-base unit of measure to an item

Specifying Which Conversion to Use
When you define an item you decide which type of unit of measure conversion to use:

  1. Itemspecific: Only uses unit of measure conversions unique to this item. If none exist, you can only transact this item in its primary unit of measure.
  2. Standard: Uses standard unit of measure conversions for this item if an item-specific conversion is not available.
  3. Both: Uses both item-specific and standard unit of measure conversions. If both exist for the same unit of measure and item combination, the item-specific conversion is used.

 
Unit of Measure Conversions During Transactions
Whenever you enter an item’s quantity, the default is the primary unit of measure for the item. The list of values for the unit of measure field displays all units of measure for which you have defined standard and/or item-specific conversions from the primary unit of measure.
Transactions are performed in the unit of measure you specify. The conversion happens automatically and item quantities are updated in the primary unit of measure of the item.

Important
: Inventory transactions and on hand balance supports decimal precision to 5 digits after the decimal point. Oracle Work in Process supports decimal precision to 6 digits. Other Oracle Applications support different decimal precision. As a result of the decimal precision mismatch, transactions another Oracle Application passes may be rounded when processed by Inventory. If the transaction quantity is rounded to zero, Inventory does not process the transaction.
It is therefore suggested that the base unit of measure for an item is set up such that transaction quantities in the base unit of measure not require greater than 5 digits of decimal precision. Define a Standard conversion for any item
In standrad conversion you specify how one unit of mesaure is related to the primary unit of measure in the same class.
In standrad conversion you cant do the following
You cant specify any sort of intra class conversion
Relationship between two UOMs not invloving primary UOM

Navigate to the Unit of Measure Conversions window  & Select the Standard tabbed region.
1 Enter a unit of measure.
2 Enter the conversion factor by which the unit of measure is equivalent to the base unit of measure established for this class.
For example, if one DZ (this unit of measure) is equivalent to 12 EA (base unit), the conversion factor is 12. Or, if EA is equal to one-twelfth of a DZ, the conversion factor is 0.08333. Define a conversion for a specific item within a unit of measure class (Intra-class)
We have seen in standard conversion we can only do convesrion from one UOM to primary UOM.
Suppose we have defined a UOM convsrion rule for a unit of measure UOM_XYZ as UOM_XYZ = 6 x Primary UOM but for a particular item the vonvsrion rate is not 6 in that case we define a intra class convesrion for  a particular item and when ever that item is transacted system ‘ll pick the convesrion rate from either intra class or standrad convesrion depending upon ITEM master set up.
Notes
We can do intra class conversion between two UOMs for a particular item only for a single class which is the UOM class of the primary UOM of the item.
For exampe Suppose ITEM001 has a primary UOM as Ea and UOM Ea belongs to class Quantity then we can define intra class conversion for the item ITEM001 between two UOMs in the class Quantity.
we cant define intra class convesrion between any other UOMs belonging to a differnt UOM class.
Navigate to the Unit of Measure Conversions window.
 
1. Select the Intra-class tabbed region.
2. Enter an item.
3. Enter a unit of measure.
4. Enter the conversion factor by which the unit of measure is equivalent to the base unit of measure established for this class.
For example, if one LB (this unit of measure) is equivalent to 16 OZ (base unit), the conversion factor is 16.
 
Define a conversion for a specific item between unit of measure classes (Inter-class)
Inter class conversion is used to convert an item from one primary UOM in one class to another primary UOM in a differnt class for a particular item. Navigate to the Unit of Measure Conversions window and Select the Inter-class tabbed region.

1. Select an item.
2. Select the destination base unit of measure of the class to which you are converting a unit of measure.
3. Enter the conversion factor by which the source base unit is equivalent to the destination base unit.
For example, if one ML (source base unit) is equivalent to one GR (destination base unit), the conversion factor is one.